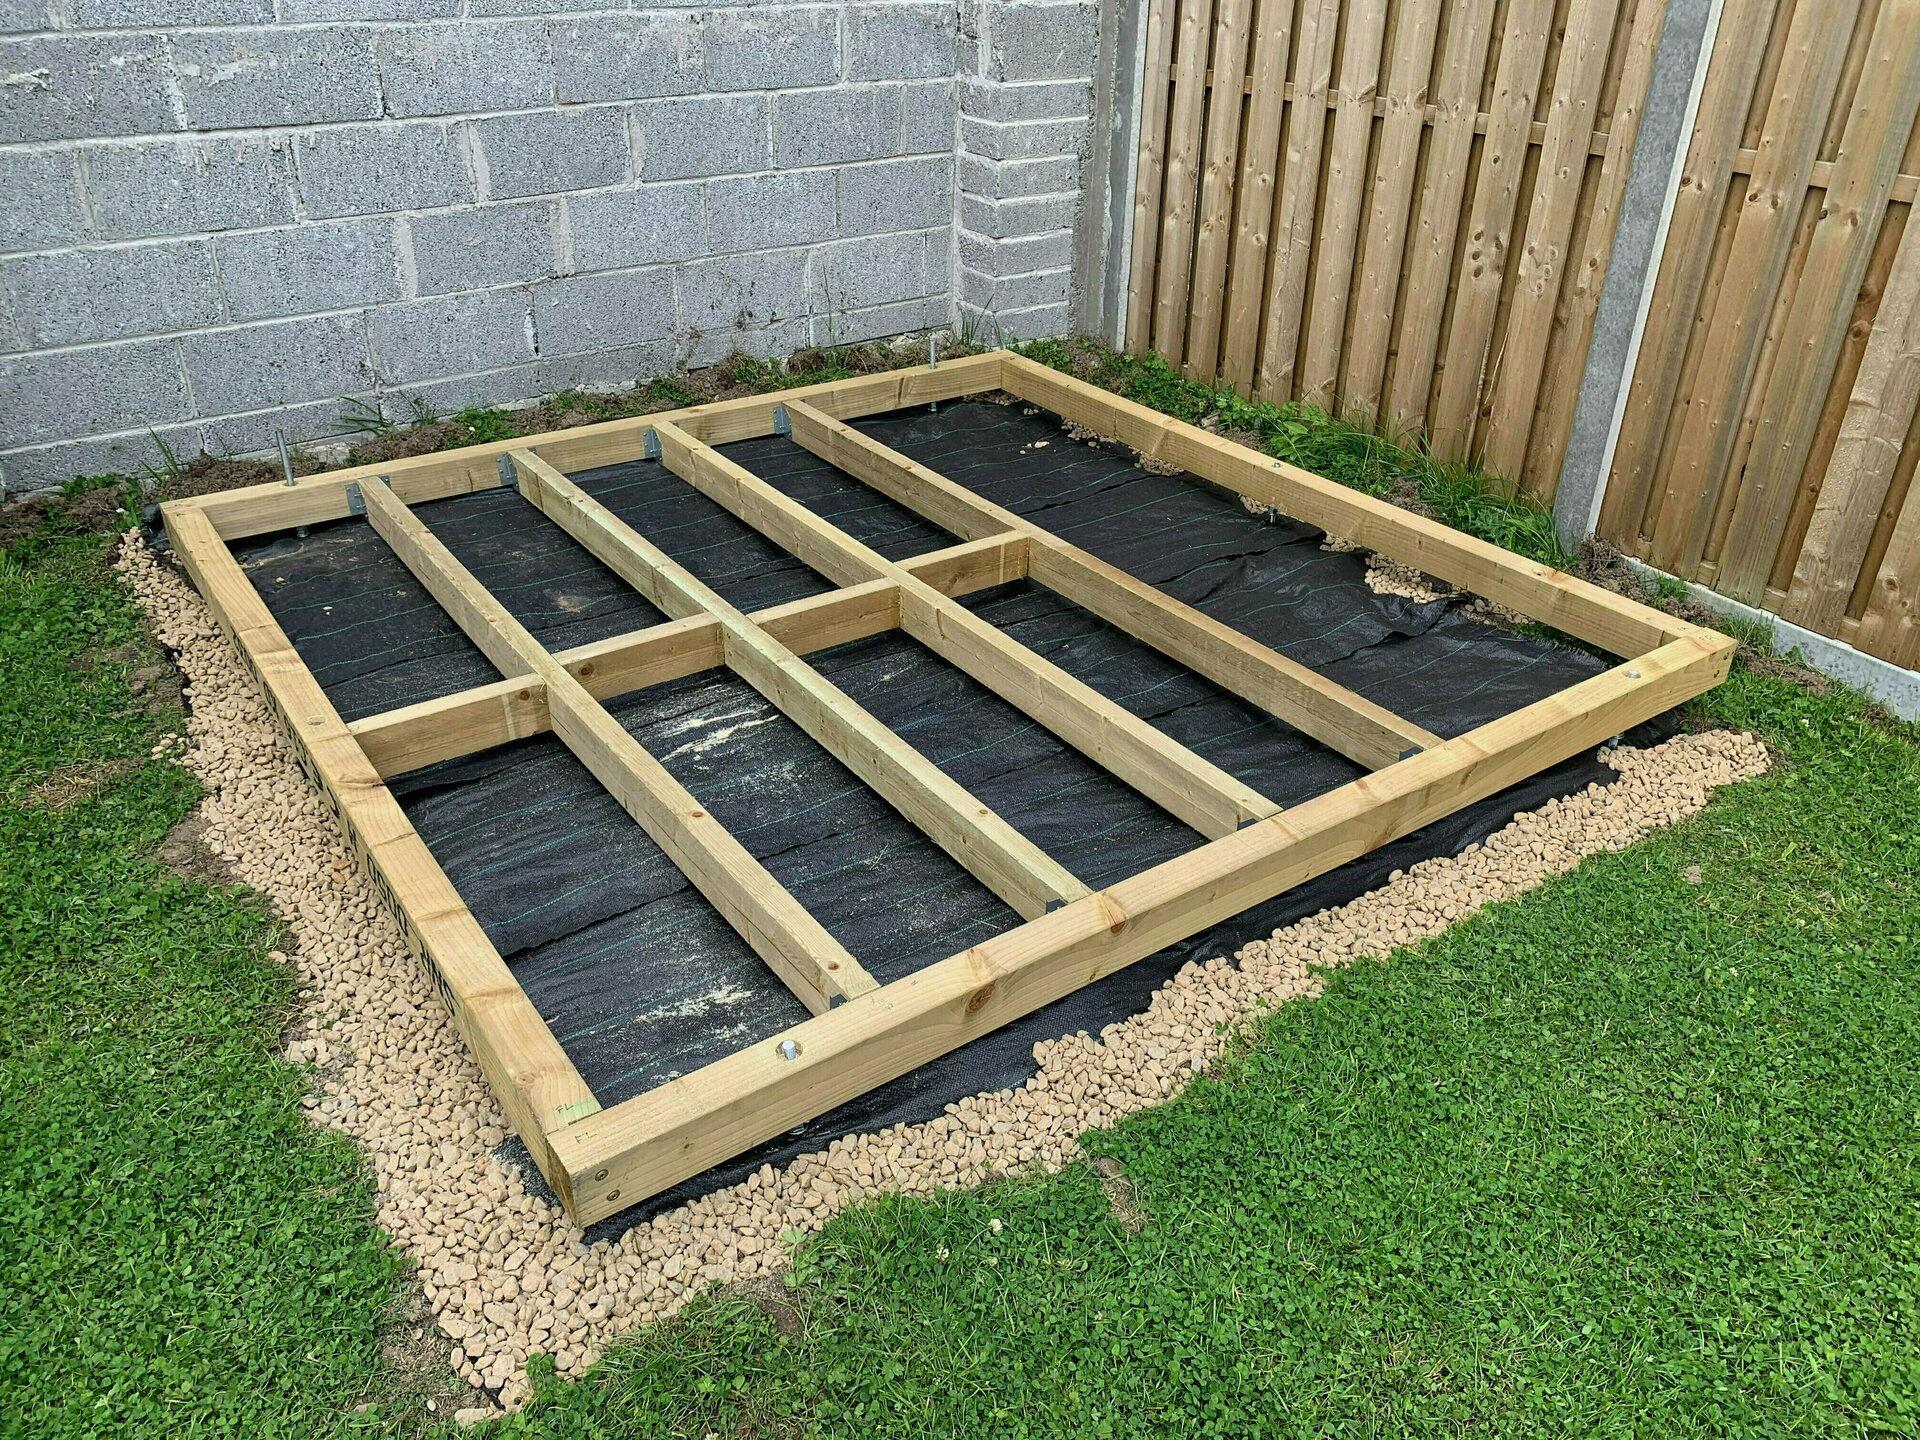
How to build a foundation for a shed – Embark on a journey to create a sturdy foundation for your shed, ensuring its stability and longevity. This comprehensive guide will walk you through the essential steps, empowering you to build a solid base that will withstand the test of time.
Delve into the intricacies of material selection, foundation types, site preparation, and construction techniques. With each step, you’ll gain valuable insights and practical guidance, empowering you to create a foundation that will serve as the cornerstone of your shed.
Foundation Types

Selecting the appropriate foundation for your shed is crucial for its stability and longevity. There are several types of foundations commonly used for sheds, each with its own advantages and disadvantages. Understanding these options will help you make an informed decision based on your specific needs and site conditions.
Concrete Slabs
- Concrete slabs provide a solid and level surface for your shed. They are durable and can withstand heavy loads, making them suitable for larger sheds or those that will store heavy equipment or materials.
- However, concrete slabs require significant preparation and labor, including excavation, formwork, and pouring concrete. They are also more expensive than other foundation options.
Piers
- Piers are individual concrete footings that support the shed’s weight. They are less expensive and easier to install than concrete slabs, making them a good option for smaller sheds or those on uneven terrain.
- Piers require holes to be dug and concrete to be poured into forms. They can be adjusted to accommodate uneven ground, but they may not be as stable as a concrete slab.
Gravel Pads
- Gravel pads are a simple and cost-effective foundation option for sheds. They involve spreading a layer of compacted gravel on a level surface.
- Gravel pads are easy to install and provide good drainage, but they may not be as stable as concrete slabs or piers, and they can shift over time.
Site Preparation
Before laying the foundation, it’s crucial to prepare the site to ensure a solid and stable base for your shed. This involves clearing the area, leveling the ground, and establishing proper drainage.
First, clear the site of any vegetation, debris, or obstacles. Remove all trees, shrubs, and roots, as they can interfere with the foundation’s stability. Next, level the ground using a rake or a leveler. This will create an even surface for the foundation to rest upon.
Establishing Proper Drainage
Proper drainage is essential to prevent water from accumulating around the shed’s foundation, which can lead to structural damage. Create a slight slope away from the shed, allowing water to drain away from the building. You can also install a drainage system, such as a French drain or a sump pump, to redirect excess water.
Marking the Foundation Layout, How to build a foundation for a shed
Once the site is prepared, mark the Artikel of the foundation using stakes and string. Use a tape measure to ensure accurate measurements and square corners. This will guide you when excavating the trenches or holes for the foundation.
Excavating Trenches or Holes
Excavate trenches or holes for the foundation according to the marked layout. The depth and width of the excavations will depend on the type of foundation you choose. For example, a concrete slab foundation requires a shallow trench, while piers or footings may require deeper holes.
Foundation Construction
The next step in building a shed foundation is the actual construction. The type of foundation you choose will determine the specific steps involved. Here’s a detailed guide for each type of foundation:
Concrete Slab Foundation
- Excavation:Dig a trench around the perimeter of the shed, 6 inches deep and 12 inches wide.
- Forming:Build wooden forms to create the perimeter of the slab.
- Gravel Base:Spread a 4-inch layer of gravel over the excavated area and compact it.
- Concrete Pouring:Mix concrete according to the manufacturer’s instructions and pour it into the forms, filling them to the top.
- Leveling:Use a screed or level to smooth and level the concrete.
- Curing:Cover the concrete with plastic and allow it to cure for 7 days.
Pier Foundation
- Digging Holes:Dig holes at the corners of the shed and at 4-foot intervals along the sides.
- Setting Piers:Place concrete piers in the holes and backfill with concrete.
- Leveling:Use a level to ensure the piers are level.
- Beams:Place pressure-treated beams on top of the piers and secure them with bolts.
- Joists:Install joists perpendicular to the beams and secure them with nails or screws.
Gravel Pad Foundation
- Excavation:Excavate the area where the shed will be placed, removing 6 inches of topsoil.
- Gravel Base:Spread a 6-inch layer of gravel over the excavated area and compact it.
- Leveling:Level the gravel base using a rake or screed.
- Geotextile Fabric:Lay down a layer of geotextile fabric over the gravel base to prevent weeds from growing.
Outcome Summary: How To Build A Foundation For A Shed

As you complete the final touches of your shed’s foundation, take a moment to appreciate the solid base you have created. This foundation will not only support the structure of your shed but also provide peace of mind, knowing that your belongings are safe and secure.
Whether you’re a seasoned builder or embarking on your first construction project, this guide has equipped you with the knowledge and confidence to build a foundation that will stand the test of time. So, let’s get started and lay the groundwork for a sturdy and long-lasting shed.

