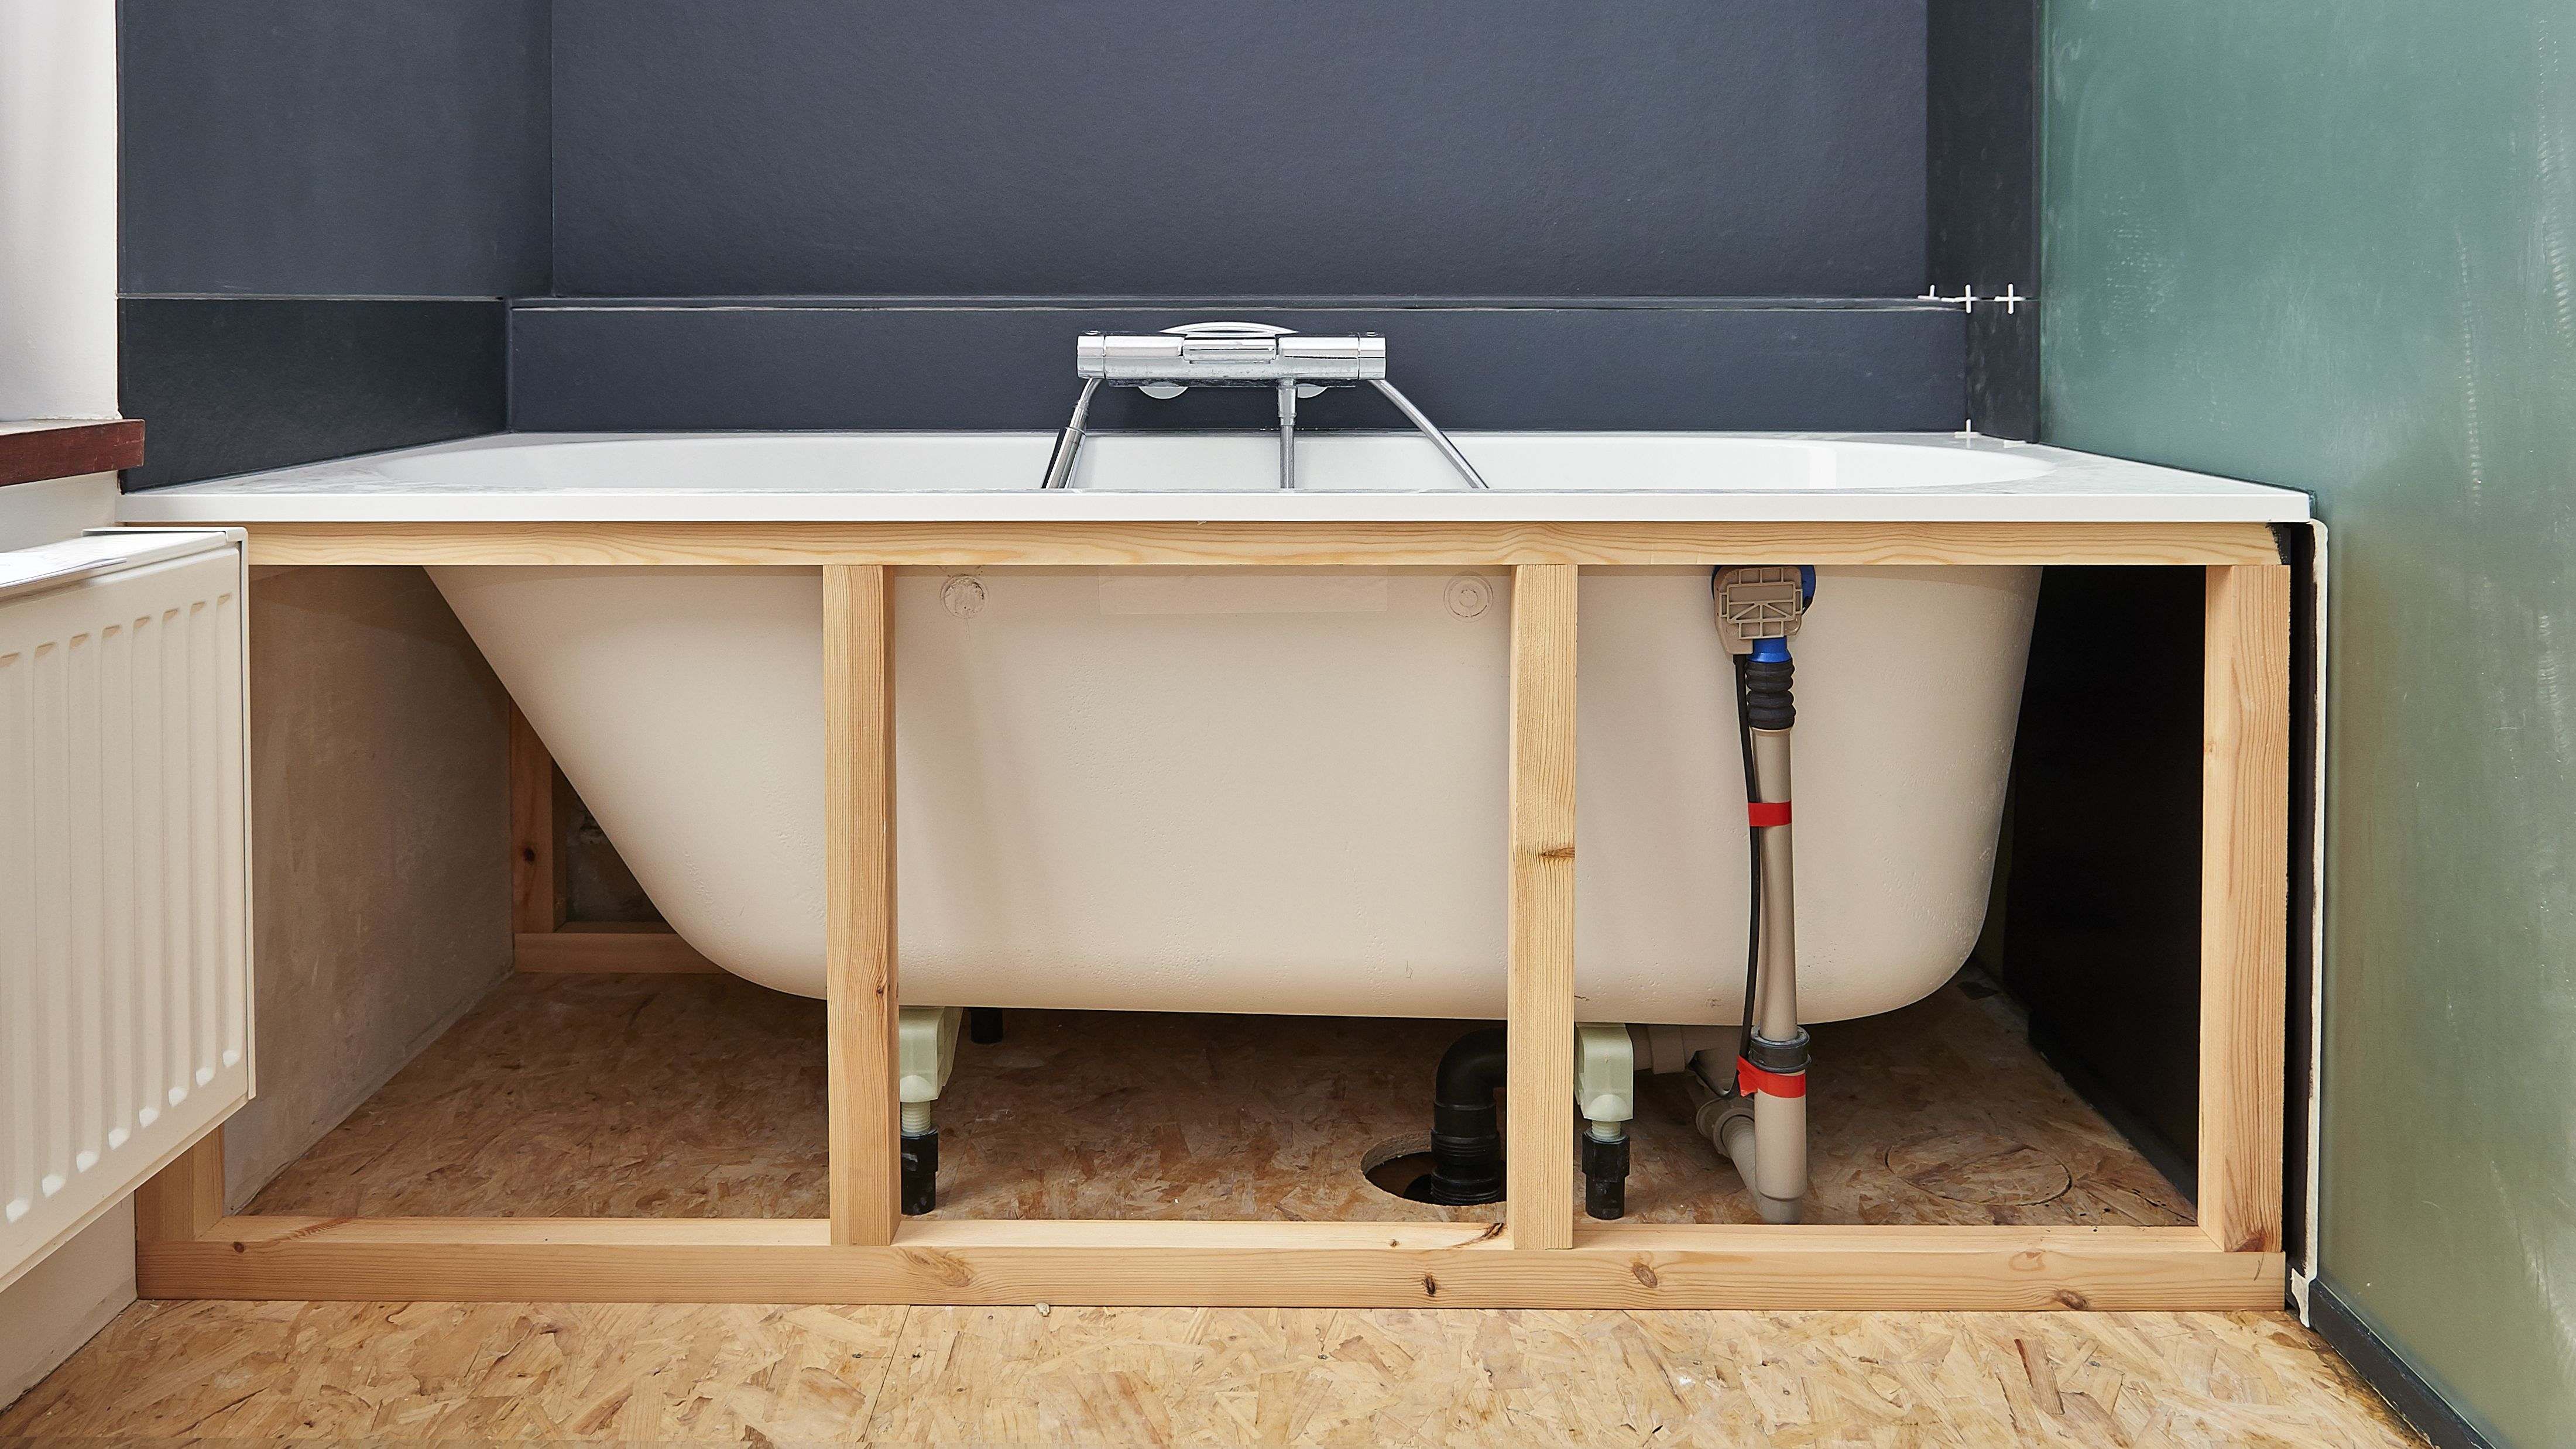
Bathtub installation instructions – Dive into the world of bathtub installation with our comprehensive guide, designed to empower you with the knowledge and confidence to transform your bathroom into a sanctuary of relaxation. From selecting the perfect tub to navigating the intricacies of plumbing, we’ll guide you through every step, ensuring a seamless and satisfying installation experience.
Tools and Materials

Bathtub installation requires a range of tools and materials to ensure a secure and leak-free installation. Choosing high-quality materials and using the correct tools for the job are crucial for a successful outcome.
The following is a comprehensive list of the necessary tools and materials:
Tools
- Adjustable wrench
- Pipe wrench
- Level
- Tape measure
- Screwdriver
- Hammer
- Caulk gun
- Putty knife
- Safety glasses
- Gloves
It is recommended to use high-quality tools from reputable brands such as Ridgid, Milwaukee, or DeWalt. These tools are durable, precise, and will make the installation process easier and safer.
Materials
- Bathtub
- Bathtub drain
- Bathtub overflow
- P-trap
- Flexible supply lines
- Caulk
- Shims
When selecting a bathtub, consider the size, shape, and material. Cast iron bathtubs are durable and retain heat well, while acrylic bathtubs are lightweight and easy to clean. The drain and overflow should match the bathtub’s finish and style.
Using high-quality materials is essential for a long-lasting installation. Look for products from reputable manufacturers such as Kohler, Moen, or Delta. These materials are designed to withstand the rigors of daily use and are less likely to leak or fail.
Step-by-Step Installation s: Bathtub Installation Instructions
Installing a bathtub can be a daunting task, but it’s not impossible with the right tools and materials. Here’s a detailed guide to help you through each step of the process:
Removing the Old Bathtub
- Disconnect the water supply and drain lines.
- Remove the caulking around the bathtub.
- Disconnect the overflow drain.
- Carefully lift the bathtub and remove it from the space.
Preparing the Subfloor
Before installing the new bathtub, it’s crucial to ensure that the subfloor is level and in good condition. This will prevent any potential issues with the bathtub’s stability and functionality.
- Inspect the subfloor for any damage or rot. Repair any damaged areas as necessary.
- Level the subfloor using a self-leveling compound or shims.
- Install a moisture barrier over the subfloor to prevent water damage.
Installing the Bathtub
- Position the bathtub in the desired location and make sure it’s level.
- Secure the bathtub to the subfloor using screws or bolts.
- Apply a bead of caulk around the perimeter of the bathtub.
Connecting the Plumbing
Once the bathtub is installed, it’s time to connect the plumbing. This includes connecting the water supply lines, the drain line, and the overflow drain.
- Connect the water supply lines to the bathtub’s faucet.
- Connect the drain line to the bathtub’s drain.
- Connect the overflow drain to the bathtub’s overflow hole.
Sealing and Finishing
The final step is to seal and finish the bathtub installation. This involves applying caulk around all the seams and joints to prevent water leakage.
- Apply a bead of caulk around the perimeter of the bathtub, where it meets the wall.
- Apply a bead of caulk around the bathtub’s drain and overflow drain.
- Allow the caulk to dry completely before using the bathtub.
Troubleshooting Common Issues
Installing a bathtub is a task that requires precision and attention to detail. While following the steps Artikeld in the previous section can help ensure a successful installation, there are some common issues that may arise. This section will identify these issues and provide troubleshooting tips to resolve them effectively.
It is important to note that if you encounter any significant problems during the installation process, it is advisable to seek professional assistance from a qualified plumber or contractor. They have the necessary expertise and tools to diagnose and resolve complex issues safely and efficiently.
Leaks, Bathtub installation instructions
Leaks are one of the most common problems that can occur after installing a bathtub. They can be caused by several factors, including:
- Improperly sealed joints
- Damaged or loose fittings
- Cracks in the bathtub or surrounding materials
To troubleshoot leaks, first identify the source of the leak. Check all joints, fittings, and the bathtub itself for any visible damage or loose connections. Once the source is identified, the appropriate repair can be made.
For minor leaks, tightening loose fittings or applying a sealant around the joints may be sufficient. For more significant leaks, it may be necessary to replace damaged components or repair cracks in the bathtub.
Uneven Surfaces
Uneven surfaces can make the bathtub unstable and uncomfortable to use. This issue can be caused by:
- Improperly leveled bathtub
- Uneven flooring
- Warped or damaged bathtub
To troubleshoot uneven surfaces, first check the level of the bathtub using a spirit level. If the bathtub is not level, adjust the leveling feet or shims underneath the bathtub until it is stable and even.
If the flooring is uneven, it may be necessary to level the floor before installing the bathtub. This can be done by adding a layer of self-leveling compound or by using shims to create a level surface.
In the case of a warped or damaged bathtub, it may be necessary to replace the bathtub or have it repaired by a professional.
Improper Drainage
Improper drainage can lead to water pooling in the bathtub, which can be both inconvenient and unsanitary. This issue can be caused by:
- Clogged drain
- Improperly installed drainpipe
- Defective drain stopper
To troubleshoot improper drainage, first check the drain for any clogs. Remove the drain stopper and use a drain snake or plunger to clear any debris or hair that may be blocking the drain.
If the drain is not clogged, check the drainpipe to ensure it is properly installed. The drainpipe should be connected to the bathtub drain and routed to the main drain line. Make sure there are no kinks or bends in the drainpipe that could restrict water flow.
Finally, check the drain stopper to ensure it is functioning properly. The drain stopper should create a tight seal when closed to prevent water from leaking out. If the drain stopper is damaged or worn, it may need to be replaced.
Additional Considerations

Choosing the right bathtub is crucial for both aesthetics and functionality. Consider the size of your bathroom and the space available for the bathtub. Determine the shape that best complements the layout, such as a rectangular tub for a modern look or a corner tub for space optimization.Material
selection is equally important. Acrylic bathtubs are durable and easy to clean, while cast iron bathtubs retain heat well. Fiberglass bathtubs are lightweight and affordable, but may not be as durable.
Designing the Bathroom Layout
Plan the bathroom layout around the bathtub to ensure optimal functionality. Position the tub near a window for natural light and ventilation. Ensure there is adequate space around the tub for easy access and movement. Consider adding a showerhead above the tub for added convenience.
Proper Ventilation and Moisture Control
Adequate ventilation is essential in bathrooms to prevent moisture buildup. Install an exhaust fan to remove excess moisture and prevent mold growth. Additionally, consider using a moisture-resistant drywall or paint in the bathroom to minimize moisture absorption and damage.
Epilogue

Whether you’re embarking on a complete bathroom remodel or simply upgrading your existing tub, this guide will equip you with the expertise to tackle the task with ease. By following our step-by-step instructions, troubleshooting tips, and expert advice, you’ll not only save money but also create a bathroom that exceeds your expectations.
