
With our comprehensive 10×12 storage shed plans free, you can effortlessly construct a spacious and durable storage solution for your outdoor needs. Our step-by-step guide and detailed materials list empower you to build a sturdy shed that will withstand the elements and keep your belongings safe and organized.
Whether you’re a seasoned DIYer or a novice builder, our plans are designed to make the process straightforward and enjoyable. Let’s dive into the world of shed construction and create a valuable addition to your property!
Materials List and Specifications: 10×12 Storage Shed Plans Free

Constructing a 10×12 storage shed requires careful selection and preparation of materials to ensure durability and longevity. This section provides a comprehensive list of essential materials and their specifications to guide you through the building process.
Lumber
- Pressure-treated lumber (2x4s, 2x6s, 4x4s): for framing, walls, and floor joists
- Plywood (3/4-inch or 1/2-inch): for roof sheathing and wall siding
- Trim (1x4s, 1x6s): for fascia, soffit, and corner trim
Hardware
- Nails (16d, 10d, 8d): for framing, sheathing, and siding
- Screws (2-inch, 3-inch): for attaching trim and hardware
- Hinges (3-inch or 4-inch): for the door
- Latch or lock: for securing the door
Roofing
- Asphalt shingles: for weatherproofing the roof
- Roofing felt: for underlayment
- Roofing nails: for securing shingles
Other Components
- Concrete blocks or piers: for foundation support
- Door (pre-hung or build-your-own): for access
- Window (optional): for ventilation and natural light
- Paint or stain (optional): for exterior protection and aesthetics
Step-by-Step Construction Guide
Building a 10×12 storage shed is a rewarding project that can provide you with valuable storage space. This guide will provide you with step-by-step instructions on how to build a shed that is both sturdy and functional.
Foundation Preparation
The first step is to prepare the foundation for your shed. This involves clearing the area of any debris and leveling the ground. You can then build a concrete slab or install concrete piers to support the shed.
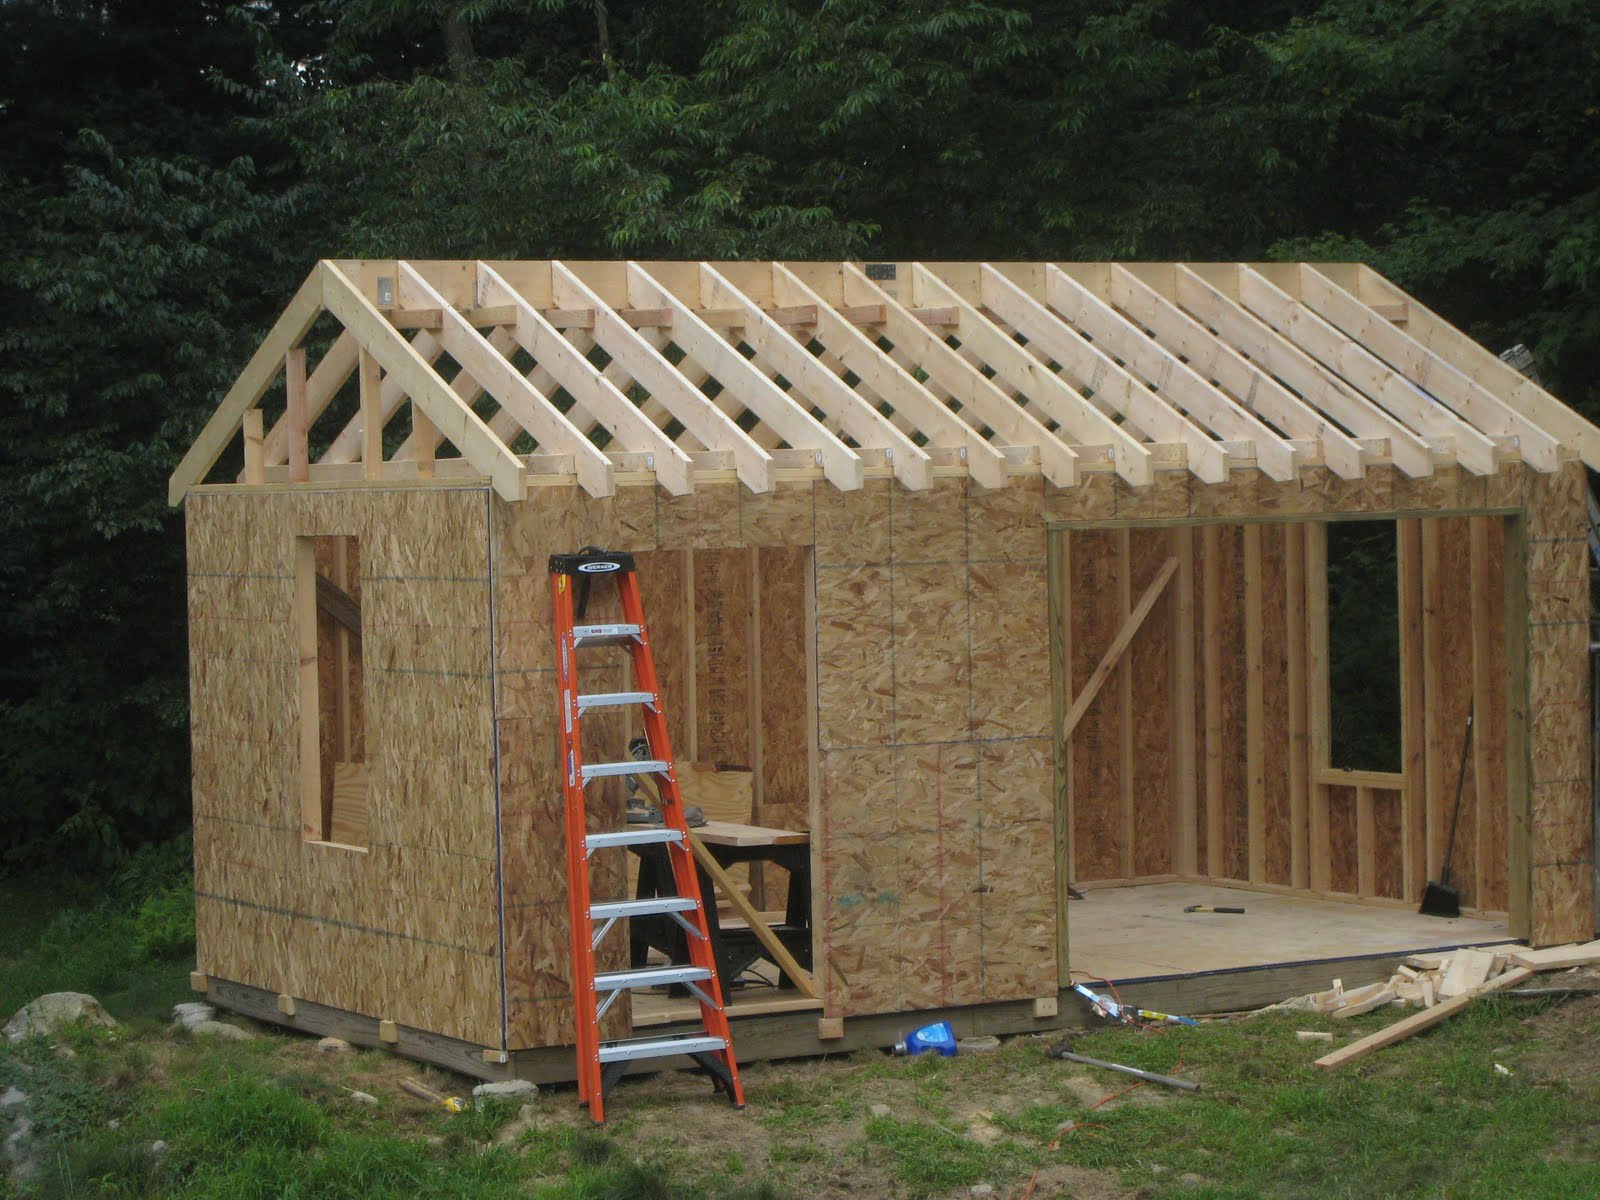
Framing the Walls and Roof
Once the foundation is prepared, you can begin framing the walls and roof of the shed. The walls are typically framed using 2×4 studs, while the roof is framed using 2×6 rafters. The walls and roof are then sheathed with plywood or OSB.
Installing Siding and Roofing
The next step is to install the siding and roofing on the shed. The siding can be made from a variety of materials, such as vinyl, wood, or metal. The roofing can be made from asphalt shingles, metal roofing, or other materials.
Adding Doors and Windows
Once the siding and roofing are installed, you can add the doors and windows to the shed. The doors can be made from wood or metal, and the windows can be made from glass or plexiglass.
Finishing Touches
The final step is to add the finishing touches to the shed. This may include painting the shed, adding trim, or installing gutters and downspouts.
Design Options and Customization
Unleash your creativity and personalize your storage shed to perfectly align with your preferences and functional requirements.
Explore a myriad of design options to transform your shed into a bespoke structure that complements your outdoor space and serves your unique storage needs.
Roof Styles
- Gable Roof:A classic and practical choice, providing ample headroom and natural light through a triangular peak.
- Lean-to Roof:Sloping gently from one side to the other, maximizing space utilization and blending seamlessly with existing structures.
Window and Door Placement
Strategically position windows and doors for optimal ventilation, natural light, and convenient access.
- Windows:Allow natural light to illuminate the interior, reducing the need for artificial lighting.
- Door Placement:Consider the frequency of access and the items stored when determining the door’s location and size.
Siding Materials, 10×12 storage shed plans free
- Wood Siding:Offers a natural and aesthetically pleasing appearance, but requires regular maintenance to prevent rot and decay.
- Vinyl Siding:Durable, low-maintenance, and available in a variety of colors and textures.
- Metal Siding:Strong, weather-resistant, and fire-resistant, providing excellent protection from the elements.
Safety Considerations and Maintenance Tips
When constructing a storage shed, safety should be a top priority. Wear appropriate protective gear such as gloves, safety glasses, and a hard hat. Use sharp tools with caution and keep them out of reach of children.
Regular Inspections
Regular inspections are crucial for maintaining the shed’s integrity. Check for any signs of damage, such as cracks in the walls or roof, loose screws or nails, and rust or corrosion. Address any issues promptly to prevent further deterioration.
Weatherproofing Measures
To protect the shed from the elements, apply weatherproofing treatments to the exterior surfaces. This includes painting or staining the wood, applying a sealant to the roof, and installing gutters to direct rainwater away from the structure.
Pest Control
Keep pests away from the shed by sealing any gaps or cracks where they could enter. Regularly inspect the shed for signs of infestation and take appropriate measures to control or eliminate pests.
Concluding Remarks
As you embark on this exciting project, remember that the journey is as important as the destination. Embrace the learning opportunities, take pride in your craftsmanship, and relish the satisfaction of building a functional and aesthetically pleasing storage shed. With our free plans and guidance, you’re well-equipped to turn your vision into a tangible reality.